Raiding is the act of attacking and infiltrating another faction’s base to steal their valuables, destroy their defenses, or claim their territory.
There are two types of raiding.
Overclaiming

Overclaiming refers to when a faction does not have enough power to maintain their claims.
Every faction has "Power". Power is the currency used to claim land from the wilderness or other factions. Each faction member provides a faction with 150 power.
When a faction member dies in a non-warzone area, the faction loses 10 power. Power is regenerated at a rate of 1 power/minute.
In the event that a faction has more land than it does power, they can be overclaimed by another faction. This can happen if:
- A faction member leaves a faction, resulting in -150 power
or,
- Dying a number of times, resulting in a faction having more land than power.
-
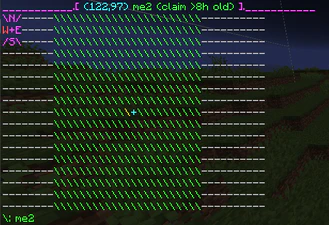
 An overclaimable faction.
 -
 Overclaiming can only begin from an outermost claim.


The overclaiming process can only begin from an outermost claim, and when a target claim is not surrounded by claims on all four sides.
Core Chunks cannot be overclaimed.
Defending
Obsidian cannot be placed more than 15 chunks away from the main shell of your faction's base.
While defending your faction's base, your faction will be entered into a Raid Session.
During a raid session:
- Obsidian has a warmup time.
- Gen-buckets are disabled.
- Cannot teleport to claims that are under raid.
- Cannot unclaim chunks that are under raid.
Objective
Faction Points can be 'stolen' from enemy factions via Raiding. 'Breaching' another faction's core chunk refers to firing TNT from a raid claim into another faction's core chunk. The amount of points acquired from breaching another faction's core chunk increases the higher the Y level of the breach to a maximum of 25%. TNT must be lobbed at a minimum Y > 20 to breach a faction's core.
- Y <= 100: 10% points
- Y <= 150: 15% points
- Y <= 250: 20% points
- Y <= 255: 25% points
The breached faction will be placed on a 8 HOUR "Raid Cooldown", where any attempts to core chunk breach again will be nullified.
It is encouraged to attempt to steal spawners and custom blocks when raiding in order to hinder the defending faction's /f point progression.